Enhance Your Home’s Aesthetics with Peel & Stick Wood Wall Planks
Understanding Peel & Stick Wood Wall Planks
What Are Peel & Stick Wood Wall Planks?
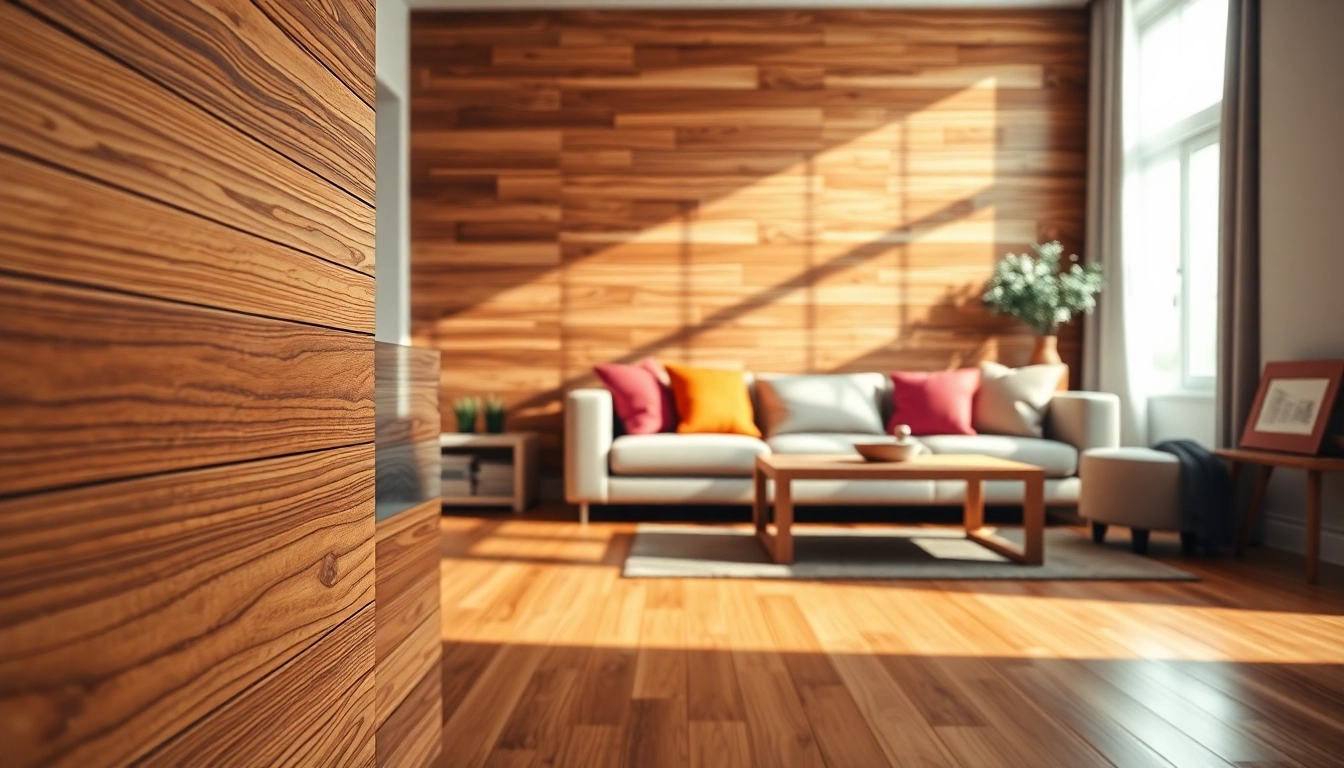
Peel & stick wood wall planks are innovative panels made from real or engineered wood that come with an adhesive backing, enabling easy installation without the need for nails, screws, or additional glue. They are designed to enhance the aesthetic of any space by offering a natural wood look that can transform walls into stunning focal points. Typically, these panels are lightweight and designed for DIYers, making them an accessible choice for homeowners who want a quick and economical way to add warmth and character to their interiors. When searching for options, peel & stick wood wall planks are often found in various styles, finishes, and color shades to suit different design preferences, from rustic to modern.
Benefits of Using Peel & Stick Wood Wall Planks
Employing peel & stick wood wall planks comes with a multitude of benefits that can enrich your home environment:
- Easy Installation: No specialized skills are necessary, making it the perfect DIY project. Just peel off the backing and stick the panel onto the desired surface.
- Cost-Effective: Compared to traditional wood paneling installations, these planks eliminate labor costs, and the materials are often more affordable.
- Versatility: They can be used in various settings, from accent walls to complete room makeovers. They can even work outdoors in sheltered spaces, adding to their charm.
- Environmentally Friendly Options: Many manufacturers offer wood sourced from sustainably managed forests, and some panels are made from reclaimed materials.
- Damage Control: With a low-risk factor involved, these wall planks can be removed later without damaging the wall surface, catering to those who frequently redecorate.
Common Applications for Peel & Stick Wood Wall Planks
The applications of peel & stick wood wall planks are vast. Here are some common uses:
- Accent Walls: Create striking focal points in living rooms, bedrooms, or dining areas by installing these planks on one wall.
- Backsplashes: In kitchens or bar areas, these planks can serve as stylish backsplashes, combining functionality with beauty.
- Ceilings: Adding depth and interest by applying wood planks to ceilings can create a cozy atmosphere in any room.
- Furniture Accents: Use smaller pieces or cut-offs to cover furniture surfaces, such as tabletops or cabinets, for a cohesive look.
- Home Offices: Craft a warm, inspiring workspace by installing these planks in your home office to enhance creativity and comfort.
Preparing Your Space for Installation
Tools You’ll Need for Peel & Stick Wood Wall Planks
Preparation is key to successful installation. Here’s a rundown of the essential tools you will need:
- Measuring Tape: For accurate measurements of the wall and the planks.
- Level: To ensure your planks are straight and aligned properly.
- Utility Knife or Cutting Tool: For trimming planks to fit edges, corners, or around outlets.
- Straight Edge or Ruler: To guide your cuts and ensure precision.
- Soft Cloth: For cleaning the surface before installation.
- Adhesive Remover: Handy if your previous wall covering needs to be removed.
Surface Preparation and Requirements
Before applying peel & stick wood wall planks, it’s vital to prepare the surface properly:
- Clean the Wall: Ensure the surface is free of dust, dirt, grease, or any other substance that might hinder adhesion.
- Repair Any Damage: Fill in holes or cracks with patching material, and allow ample time for it to dry.
- Ensure a Smooth Finish: If the wall has texture or bumps, consider sanding it down to achieve a flatter surface.
Measuring and Planning Your Design
Proper measurement and planning can make a huge difference in the final outcome:
- Measure the Wall: Use your measuring tape to determine the height and width of the wall area you want to cover.
- Calculate the Number of Planks Needed: Knowing the planks’ coverage area will help you determine how many you need to purchase.
- Design Layout: Before installing, consider how the planks will align. Some may prefer a staggered pattern, while others may opt for a straight look.
Step-by-Step Installation Guide
How to Install Peel & Stick Wood Wall Planks
Now that your wall is prepared, here’s a straightforward guide to installing your peel & stick wood wall planks:
- Start at the Bottom: Begin installation at the bottom of the wall, ensuring the first plank is level.
- Peel Off the Backing: Carefully peel the adhesive backing, exposing the sticky side without touching it too much with your hands.
- Press and Secure: Align the plank and press it onto the wall firmly. Move from the center outward to eliminate air bubbles.
- Cut the Planks as Necessary: Use your utility knife to trim the planks at edges or corners as you progress.
- Adjust as Needed: Ensure that subsequent planks are placed snugly without gaps. If using a staggered design, start the next row with a half plank.
- Finish with Touch-Ups: Check for any inconsistencies and make necessary adjustments before moving on to the next section.
Tips for Achieving a Professional Look
To ensure a polished and professional finish, consider the following tips:
- Use a Level: Throughout the installation, frequently check that the planks remain level.
- Temperature Considerations: Install planks when temperatures are moderate to ensure the adhesive functions properly.
- Pattern Consistency: Maintain consistency in your pattern, especially if dealing with differing plank widths or colors.
Fixing Common Installation Mistakes
Even the best projects can have hiccups. Here’s how to troubleshoot common mistakes:
- Bubbles: If air bubbles appear, gently lift the plank, reposition it, and squeegee out the bubble without damaging the adhesive.
- Alignment Issues: Don’t hesitate to remove planks that are not aligned properly. This may seem tedious, but a consistent look is essential.
- Adhesive Inconsistencies: If a section doesn’t stick well, using a spray adhesive can provide added security where needed.
Maintaining and Caring for Your Peel & Stick Wood Wall Planks
Cleaning Techniques for Longevity
Keeping your peel & stick wood wall planks looking good takes minimal effort:
- Soft Cloths: Use a soft microfiber cloth for regular cleaning to avoid scratching the surface.
- Mild Detergents: In cases of sticky stains, mix a solution of mild soap and water to clean without harming the wood finish.
- Avoid Harsh Chemicals: Abrasive cleaners or solvents can damage the adhesive backing, reducing the life of your wall planks.
Avoiding Damage to Your Wall Planks
Preventative care is essential for longevity:
- Keep Away from Excessive Moisture: In areas like bathrooms or high-humidity rooms, consider using a suitable finish or protective coating.
- Avoid Direct Sunlight: If possible, limit exposure to direct sunlight, as it can lead to fading over time.
- Be Mindful of Sharp Objects: Ensure that furniture or decor does not edge too closely to the wall, as scratching can occur.
When to Replace Your Peel & Stick Wood Wall Planks
Even the best materials have a lifespan. Here are signs that it may be time to replace your wall planks:
- Peeling Edges: If you notice any edges starting to peel away from the wall, it may indicate it’s time for a refresh.
- Significant Wear or Damage: Scratches, chips, or other damage can detract from the aesthetic appeal.
- Fading or Discoloration: If the color no longer matches your decor or appears washed out, consider replacing them for a renewed look.
Exploring Design Ideas with Peel & Stick Wood Wall Planks
Creative Ways to Use Peel & Stick Wood Wall Planks
Your creativity can shine when using peel & stick wood wall planks. Here are some inspiring ideas:
- Feature Walls: Opt for bold colors or textures to create an eye-catching feature wall that draws attention.
- Mixed Materials: Combine wood planks with other materials, like metal or tile, for an eclectic look.
- Vertical Gardens: Use wall planks as a backdrop for indoor plants, blending nature with the beauty of wood.
Combining Styles and Patterns
Expanding on design, it’s essential to know how to combine styles effectively:
- Contrasting Textures: Pair smooth wood planks with rough-hewn surfaces to add depth and visual interest.
- Color Matching: Coordinate colors with existing decor to achieve a seamless integration that enhances the overall look.
- Layering Techniques: Utilize multiple planks in varying tones or patterns to create a unique and personalized design.
Real-Life Examples of Stunning Wall Transitions
To inspire your project, look at successful real-life installations:
- Living Room Transitions: Transforming a plain living room into a rustic retreat by integrating reclaimed wood planks along the main wall illustrates the dramatic impact of texture and design.
- Creative Office Spaces: An office that features a combination of wood planks along one wall, paired with a sleek desk made of the same material, demonstrates how to create cohesive work environments.
- Dining Areas: Imagine a dining area accentuated by a feature wall of dark wood planks that create a sophisticated backdrop for intimate dinners or family gatherings.
Leave a Reply